Product Review: Michaels Recollections Traveler’s Notebook

IMG_2728

Hello friends! I am back with a quick product review of the Michaels Recollections Traveler’s Notebook. I am completely late to the party with regard to traveler’s notebooks! After seeing so many gorgeous photos of traveler’s journals on Instagram, I had to give this a try. I purchased this pink notebook at my local Michaels store about a week ago…on sale…for only $5.00!!! Wowza!

IMG_2724

For those who are not familiar, a traveler’s journal (or notebook) is a simple notebook with a leather cover, used to jot down notes, ideas, quotes, discoveries, details from one’s travels, etc. Traveler’s notebooks have been around for decades! A popular brand, the Midori Traveler’s Journal, has taken off like wildfire! Notebook enthusiasts are using these journals for a variety of reasons to include planning, memory keeping, and art journaling, just to name a few.  I plan to use my notebook to jot down my business ideas, random thoughts and musings, and for memory keeping.

Here’s the cover of my notebook – it’s a faux leather cover lined with thin felt material. This journal comes in several colors but at the time I purchased my journal, the only colors that were left were pink and cream. The cool thing about traveler’s notebooks is that over time, the covers will look worn…and that is exactly the purpose!

IMG_2725

This journal comes with two inserts – one is white and the other is craft, a black string, and a bumble bee charm. I purchased additional charms from the jewelry section at Michaels – I wanted to add more flare to my cover!

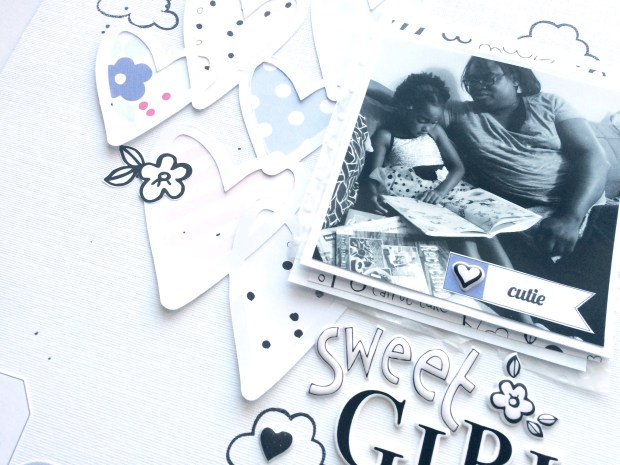
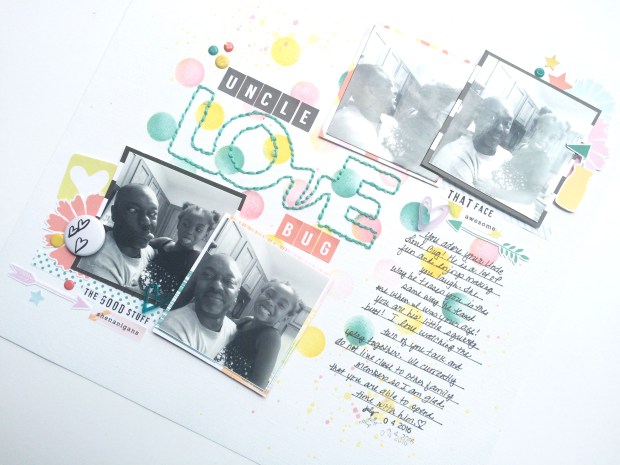
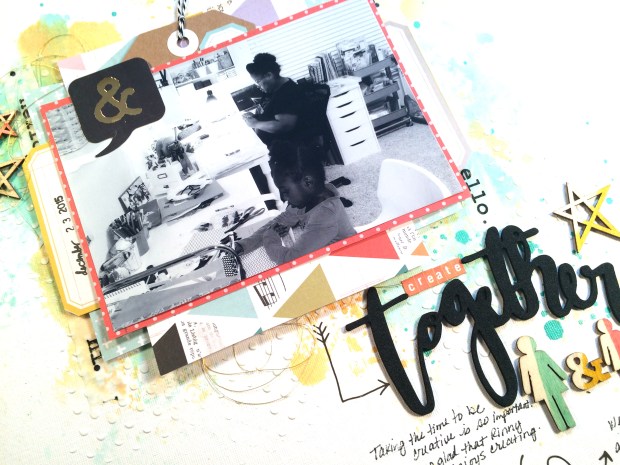
I thought a good place to start was to decorate the cover of the white insert. I used a number of items from my stash – two pocket scrapbook cards, washi tape, enamels dots, stickers, font stamps by Amy Tangerine, and a roller date stamp by Heidi Swapp. I didn’t have a plan for the design of my cover or my first page. I just went with the flow and experimented. I like the results!

IMG_2727

IMG_2726

I am so excited that I finally gave this a try! I look forward to filling my journal with tons of random and fun things!

Check out the product review video for this journal on the Victoria Marie YouTube Channel! Thanks for stopping by!

The Cut File Challenge Week 3: 17turles

Hello everyone! Are you ready for another fun cut file? I am so excited to share this cool cut file with you from 17turtles called Happy Times.

Happy_Times_Juliana_Michaels

Isn’t this awesome!!! The cut file was designed by Juliana Michaels, owner of 17turtles. Juliana is widely known in the scrapbooking industry and offers FREE digital cut files on her website. Here’s how I used this week’s cut file.

I love using cut file phrases for titles!

IMG_6616

This is a photo of my spouse and our daughter during yet another one of my picture taking attempts. They think it is so funny to cover their faces when I am trying to take a quick picture of them. There is never a dull moment with these two!

IMG_6620

I cut this file on a sheet of Neenah Bright White cardstock. I only wanted to use the phrase “Good Times” and the heart trio that is positioned at the bottom of the layout. I created a dipped effect on the heart trio by using Dew Drops Fade Resistant Die Ink (Pear Tart); masking the image with washi tape then applying the ink at the bottom of the hearts. I did the same technique on the wood veneer stars (Dandelion and Bahama Blue) and the phrase “#besties” (Rose Bud).

IMG_6617

I layered the titled over the photo. I was careful not to cover the main focal point. I like how the title pops out and draws the eye to the picture!

IMG_6619

I used exclusive papers and embellishments from the Sweet Jane and Me, Myself, and I kits by Scraptastic Kit Club. Both of these kits are summer inspired with bright bold colors and fun accents! I also used a few items from my stash such as the pink clip on the top right side of the photo, the star wood veneers, and the acrylic plus sign.

Okay folks, I hope you enjoy this week’s cut file! And I hope you are playing along with this challenge! Be sure to check out 17turtles for more FREE cut files! Here’s the process video for your viewing pleasure!!! Happy scrappin’!

New Class! Make the Kit – A Mini Course!

Hello Scrappy Friends! I am so excited to announce my new class, Make the Kit – A Mini Course!

Make the Kit Intro

This is a self-paced course that will inspire you to use your stash to make functional and beautiful scrapbooking kits.

The course will begin with a brief overview that will cover general information about scrapbooking kits, how to shop your stash for items to include in your kit, how to make, organize, and store your kit, and tips on how to use your kit.

This course will be available starting AUGUST 19, 2016!

The course includes:

  • 4 Lessons with Instructional Videos and full color PDF Study Guides
  • 5 Exclusive Process Videos that will inspire you!
  • A Tour of Victoria Marie’s Scrappy Stash! See what Victoria Marie uses to make awesome scrapbooking kits!
  • Full Color PDF of the layouts completed in this course
  • Full Color PDF Make the Kit Planning Worksheet
  • Access to the private Make the Kit Facebook Group!

Starting August 19th – August 26th, you can purchase the course for only $10.00!

After August 26th, the course will go to regular price at $12.00.

Be sure to subscribe to the Victoria Marie Blog for updates about current and upcoming classes! I look forward to seeing you in the classroom!

Week 2: The Cut File Challenge – The Cut Shop

Welcome to Week 2 of The Cut File Challenge!!!! This week I am using an awesome cut file from the incredible Ashley Horton, Owner and Designer at The Cut Shoppe. I LOVE Ashely’s cut files and was so excited to spend a bit of time on her Etsy shop. Here is one of the cut files that I purchased called Starburst!

il_570xN.1047173171_7bnc

And here’s how I used this cut file…

IMG_6325

Isn’t this an awesome cut file!? For this layout I used several items from an older Heidi Swapp collection.

IMG_6326

I cut this design using my Silhouette Cameo. I wanted the starburst to radiate from the center of the layout so I positioned the design to cut in the middle of background paper. Next,  I backed the cut image with brightly colored patterned paper. I love how all of the colors peep through the stars! An alternative to this is to overlay this cut design over velum, glitter paper, or a watercolor background, or use this cut file as a stencil.

IMG_6324

I wanted to make sure that I didn’t cover up too much of the starburst so I positioned the photos toward the bottom right of the cut file.

IMG_6323

I finished the layout by creating clusters of velum and chipboard stars and hearts around the photos. I used the chipboard phrase “awesome” along with two Heidi Swapp foam sticker fonts to create the title “Awesome Superstar”.  Lastly, I backed the entire layout on yellow patterned card stock to add just a bit more interest.

This was a really fun cut file to use! I will warn you…those little stars can be a bit tricky to remove so I recommend using the double cut feature on your die cutting machine.

Check out the process video for this layout on my YouTube Channel! And don’t forget to stop by The Cut Shoppe and check out of the beautiful cut file designs by Ashley Horton!

I will see you next week with cut file #3!!!


16 Days

There was once a time when my spouse and I talked about the day when our little one would start kindergarten. At that time it seemed so far away. Then the day came – uniforms, backpack, lunch box…and off she went.

Sadly, her first year of primary school came and went. Yes, I am a dramatic mama!

Toward the end of the school year, with only 16 more days left, I decided to take a few pictures of our typical morning routine. I captured this picture as we walked to our car one morning on the way to school.

IMG_6319

She was still so little, yet so big. She had learned a ton of new and cool things. And there she was, an experienced kinder kid, preparing for the next step in her educational journey.

Time needs to slow down…just a bit.

IMG_6317

For this layout, I used two exclusive kits from Felicity Jane, Happy Day and Next Stop. The photo was the focal point for this layout, highlighted by layers of flowers, tags, and ephemera. The colors are so crisp and clean – I love it when a layout comes together!

IMG_6315 copy

And here’s the process video for this layout! Enjoy!

In the Pocket – “Hello Barbie

I love pocket scrapbooking! I like to mix my traditional layouts with pocket scrapbook pages – I feel that is adds a bit of interest to my scrapbooks. Here’s my latest pocket layout using a Becky Higgins Project Life page protector (Design A):

IMG_6297

So my little one has recently taken an interest in playing with Barbie dolls. Her collection of Barbie dolls has increased and now she is asking for a Barbie Dream House and such! I can’t blame her! I loved Barbies as a kid. My spouse took her to the Matel Warehouse that’s just minutes away from where we live and together they bought a couple of new dolls, outfits, and a Barbie hair salon that actually sprays real water and comes with a glitter brush.

Oh joy. 😦

Of course I had to document this moment in her life for her six-year-old album. Her interests are changing so much these days. She seems to love everything: super heroes, comic books, fashion, singing and dancing, science and math! My spouse and I love it!

IMG_6305 copy

For this layout I used two exclusive kits from Felicity Jane, Happy Day and Next Stop. I like to keep my pocket layouts simple and focused on the story.  The colors came together seamlessly – I love how the black and white elements compliment the reds, blues, yellows, and pinks in the papers and embellishments.

IMG_6299

I added sequins and velum flowers to one of the pockets for interest and whimsy. 🙂

IMG_6300

IMG_6296

I really love how this came out! Check out the process video for this layout on my YouTube Channel! Enjoy!

Week #1 The Cut File Challenge – Felicity Jane

Welcome to Week #1 of The Cut File Challenge! This week I used the Heart Cluster cut file from Felicity Jane. You can find this cut file HERE.

Picture1

Felicity Jane cut files can be found on the Silhouette Design Store website. I am not certain if these cut files are compatible with any other electronic die cutting machine besides the Silhouette brand of machines so be sure to check it out before purchasing.

I recently subscribed to Felicity Jane and I was so excited that they offer cut files as well! I purchased the Heart Cluster cut file for only $0.99. Cut files are generally affordable and the design options are endless!

Here’s how I used this cut file:

Cut File Challenge WK1P1

For this layout I am using the exclusive Happy Day Kit designed by my scrappy buddy Suze Fish for Felicity Jane. This kit contains the most gorgeous colors and icons! Featured in this layout is our the loves of my life, partaking in a little afternoon story time. My little one loves to read, especially chapter books about Barbie!

I decided to back with cut file with patterned papers from the kit. My plan was to keep everything light and airy. Once this was done I added the title, stamping, and a few embellishments. I love using cut files because most of the work is done for you!

IMG_6225

Be sure to stop by the Silhouette store and check out this and other cut files by Felicity Jane. I will see you next Friday for Week 2 of The Cut File Challenge!

View the process video for this layout HERE!

IMG_6226

Happy scrappin’!

New Series: The Cut File Challenge!

Here’s the challenge…if you chose to accept it!

Many scrappers have awesome electronic die cutting machines just hanging around…possibly collecting dust. Well, not anymore my friends! Are you ready for…

THE CUT FILE CHALLENGE!

13782107_1833983643491153_6826563210259525306_n

For the next 10-weeks I am going to post a process video every Friday featuring cut files that I purchase from some of my favorite shops. I will use these cut files in a creative way on a scrapbook layout. And don’t worry, I will post links to the shops where I purchase these cut files in the description section of each process video!

This challenge is designed to inspire you to use your die cutting machines and to be creative. Why waste money on scrappy tools if we don’t use them!

At the end of this 10-week series, I will conduct a drawing for an awesome mystery prize! All you have to do is leave a comment in the “comment section”on any of the videos in the series. At the end of the series, I will pick a lucky winner.

Meanwhile, bust out your die cutting machines and play along! This is going to be so much fun!

The first video in this series will be posted tomorrow, Friday, July 22nd! I hope you play along with me!

Happy cut filing!!!!


Scraptastic Design Team – Sweet Jane Kit

Hello Scrappers! Here’s my latest design team layout for the Scraptastic Club Design Team. For this layout I used the June 2016 Sweet Jane Kit. This week I teamed up with Jill Sprott, a fellow Scraptastic Design Team Member, for the weekly Pinterest Inspiration challenge. Here’s our inspiration piece:

3335_n

Source: Pinterest

And here’s my take:

LoveBug1

These photos were taken on the 4th of July and feature my brother Love and my kiddo Corinne. We had my mom and brother over for a BBQ dinner and Corinne had a lot of fun playing with her Uncle Love Bug. Yes, his name is Love and yes, we call him Love Bug or Love Buggy (some childhood nicknames never go away)!

LoveBug3

I enjoy watching my brother and daughter play together. Love and I are 15 years apart – the way he plays with Corinne is the same way he played with me! Ever the joker, tossing me around (I’m sure he probably dropped me at some point 🙂 ), calling me names…typical big brother shenanigans. My brother is so good with kids! He’s a great father…both of his children are grown so having Corinne around brings him a ton of joy!

LoveBug2

Using a circle stencil by American Crafts and distress ink by Tim Holtz, I created this awesome background as the base for my layout. Next, I wanted to use the exclusive Scraptastic “love” stencil that came with the kit as part of the title. I used a paper piercer to poke the holes – tracing the word “love”, then I did a simple back stitch using blue sewing floss. This process took me over 30 minute to complete (mainly because I suck at sewing). Overall, I’m impressed with the look!

I used a variety of embellishment from the kit – die cut flowers and arrows, acrylic hearts, phrase stickers, and an exclusive flare. This entire kit contains exclusive Scraptastic Club items, with the exception of the enamel dots by Fancy Paints Designs, sewing floss by Amy Tangerine, distress ink by Tim Holtz, and mist by Heidi Swapp.

Click here to view the process video for this layout! Thanks for stopping by! Enjoy!


Scrapbook Like You Are a 6-Year Old!

This past December, I spent some time cleaning out my old Christmas scrapbooking stuff and decided to give a substantial amount of my stash to my little Corinne. She loves spending time with me while I am scrapbooking and looks forward to our crafty sessions.

When I finished cleaning, I presented her with a bunch of scrapbooking goodies.

“Oh mom, thank you, thank you! I love it all!” she said with such excitement! She immediately sat on the floor in my craft room and poured through her new crafty loot.

IMG_4761

As I watched my baby meticulously sort and organize her new scrappy supplies in a purple Iris case, I couldn’t help but be in awe of her wonder…so pure and innocent. She touched every item ever so gingerly before placing it in her craft box.

Since that day she asked if she could play with her scrapbooking supplies. So yesterday, she sat at her daddy’s desk, with me sitting across the room at my desk, and we scrapped together.

I put on some Taylor Swift, her favorite singer, and we chilled. I kept looking over at her, listening to her “narrate” as she has seen me do when I am recording YouTube videos. She selected the papers and embellishments for her layout and set them aside and placed everything else back in her case. She squealed with delight when I gave her two rolls of washi tape!

“Oh wow mom!! This is so cool! Just what I needed!”

She asked for a couple of photos for her layout so I reached into my picture stash and came up with three pictures from her first day of Kindergarten.

“Perfect!” she said with delight.

IMG_2792

She sat and played with paper and washi tape for what seemed like an hour. She selected every little detail with much care and attention. She didn’t second guess herself. She went with the flow, placing bows in the corners of her layout and surrounding her photos with washi tape. She sang along to her favorite Taylor Swift song while cutting pieces of pattern paper with mommy’s big girl scissors.

Big girl scissors!

And when she was done, she was more than pleased with her work!

“Mommy look!”

“Oh that is awesome baby girl! Let’s take a picture!”

“Okay, but just one more detail.” Apparently she added another sticker…

“Perfect!” she said with a huge smile!

What if we all scrapbooked like a 6-year old? What if we selected just a few of our most favorite items, sat down at our craft desks and just played?

What if we didn’t care about overall page design or stopped spending hours looking for the perfect embellishment?

What would happen if at the end of our scrappy session…we looked at our layouts and said, “Hey, this is great!” even if it really isn’t great…but just done and good enough?

What if we poured through our scrappy supplies as if it were the first time we ever seen scrappy supplies?

What if we just enjoyed this hobby without limitations, self-criticism, self-doubt, or the need to be the “perfect” scrapper?

What if we just…had fun?

Imagine what our scrappy lives would be like!

Scrap like a 6-year old…you won’t regret it. 🙂