
I am so happy to report that in a few hours my family and I will be entering the happiest place on Earth…Walt Disney World in Orlando, FL! If you have followed me on Instagram (@victoriamareiscraps) and on Facebook, then you know that this vacation has been 18-months in the making for my family! And to document this epic adventure, I started a new series on the Victoria Marie YouTube Channel called Documenting Magic. To learn more, check out this blog post and video!
At this point in the series (Part II), I am in the process of preparing a Disney traveler’s notebook and a small Disney scrapbooking travel kit to take with me to Disney World. My intention is to spend a bit of time on each day of my trip to document my thoughts and experiences. I am also using this traveler’s notebook as a reference tool that I will later use to recall important facts and details as I am putting my Disney scrapbook together (Part III of the series…stay tuned).
This week I spent just a few minutes gathering the tools and scrapbooking materials I need for my Disney traveler’s notebook. My intention is to only take a small amount of tools and supplies.
So, what am I taking? Inquiring minds want to know! Take a look!
- Thirty-One Tote: I am using a small Thirty-One tote to hold all of my scrappy goodies! There is enough room for my tool kits, TN notebook, small paper pads, a portable printer, and embellishments.

Everything fits so nicely inside!
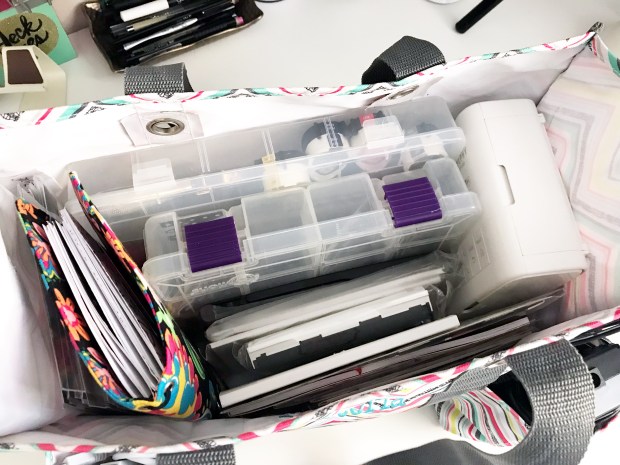
There are small pockets on all sides of the tote, perfect for tools, stamps, and cords.

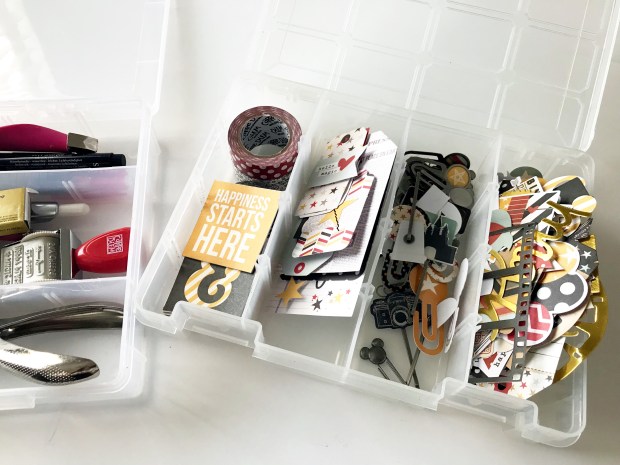
2. Tool and Embellishment Kit: Using two storage containers from my stash, I created a kit that houses my small tools – hole punch, roller date stamps, scissors, pens, small ink pads, and adhesives.


I created another kit that holds a variety of embellishments – die cuts, tags, clips, and washi tape.
3. Tech and More Tools: I’m taking my Canon Selphy Photo Printer and my Polaroid Zinc Mini Printer (2×3 photos). It is important to me that I am able to print photos on demand. These two devices travel well without taking up too much space.

Of course I can’t forget my trusty adhesives and small craft stapler!

I am also brining a few acrylic blocks and stamp pads.

4. Stamps, Stickers and Such: I pulled a variety of travel themed stamps for this project in addition to 2 letter font stamps – perfect of title work in my TN!

And then there are stickers because…why not! I am also taking a 6×6 paper pad by Echo Park.

5. Travelers Notebook: And last but not least, I am taking my Disney traveler’s notebook, complete with homemade inserts that are embellished with items from my Disney Scrapbook Kit. To see the unboxing of my Disney Scrapbook Kit and a review of my Disney TN cover, click HERE and HERE!


Well, there you have it! I am so excited for this epic experience and all of the documenting opportunities it has to offer! If you haven’t already, be sure to follow me on Instagram (@victoriamariescraps) as I will be posting photos of my TN spreads on my Instagram feed!
Have a magical day! Thanks for stopping by!

Here is that “what’s in my bag post” I was hoping you would do! I love the whole set up! I can’t wait to see your pictures!!! Have a blast!
LikeLike